- Best for
- A weekend counter-and-shelf reset in the kitchen
- Time
- Roughly 2 to 5 hours hands-on, plus DIY drying time
- Difficulty
- Beginner-friendly
- Cost
- Comes in under $700
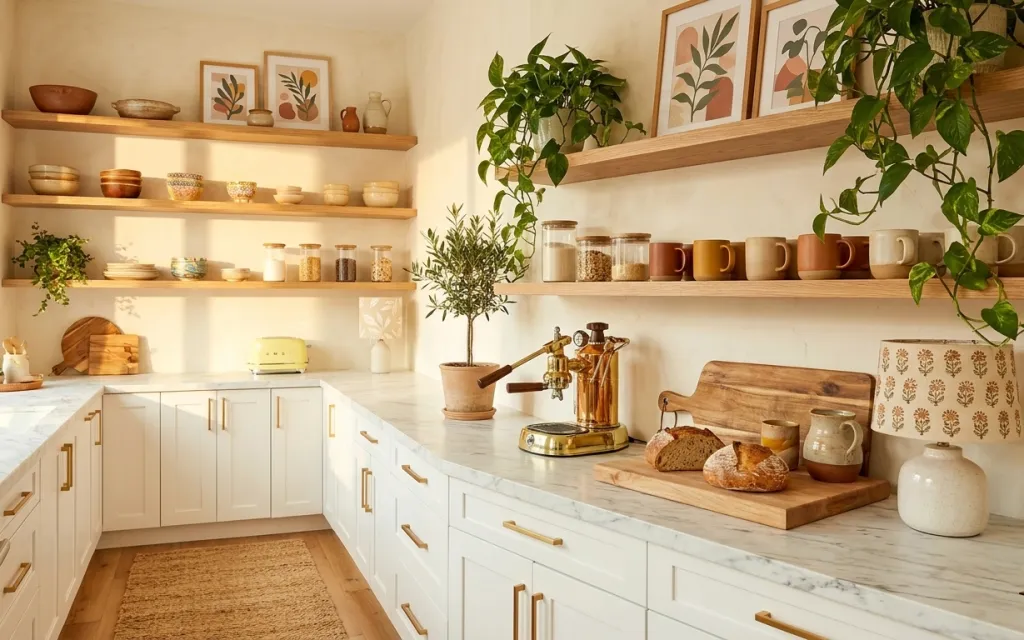
The terracotta counter-and-shelf corner that's working in kitchens this year
What makes this corner click is rhythm. Open shelves sit up top, a working countertop runs below, and a handful of warm materials keep showing up: light wood, a brassy metal, terracotta ceramics. The white marble-look counter and subway-tile backsplash give you the contrast, then your eye settles on the wood cutting board and the printed dish towel. Even the greenery reads deliberate, one small pot for height and a leafier one to ease the corner. If you only do one thing, make it the storage you can actually see.
My first instinct was to match everything, identical mugs, matching jars, one uniform mood. Then I remembered what a real kitchen holds: bread, coffee, and a surface you can wipe down without a whole production. That's what won me over here. The pieces aren't twins; they're tied together by warm tones and related finishes, so the counter still looks pulled together even with the everyday stuff sitting right out in the open.
Layer 1 — jute area rug runner ($120) softens the splash zone
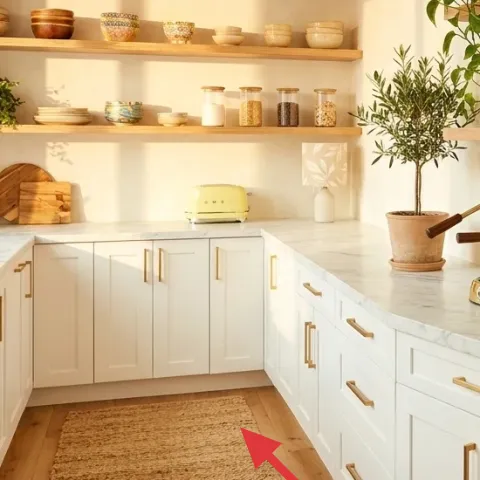
A jute runner is the kind of small call that ends up shifting the whole counter zone. Here it grounds the walkway, breaks up the run of white between the marble-look counter and the cabinets, and gives your feet something softer to stand on at the sink. I'd reach for jute or another natural fiber over a flat rubber mat because the warmth and texture together make the terracotta and wood look richer by contrast. The catch: natural fiber wants a bit of care near water, so think of it as something you blot rather than scrub.
Catch spills early
Natural fiber stays nicest when you blot water right away, before it can dry into darker tide lines.
Layer 2 — brass sink faucet ($150) repeats the warm metal
The brass faucet pulls double duty, upgrading what you use every day while repeating the warm metal you spot again on the countertop pieces. It sits in the busiest patch of the kitchen, so even a modest swap registers fast. I'd pass on an all-chrome version here; cool chrome tends to argue with the terracotta and the honey-toned shelves, where brass keeps the corner reading as one piece. The downside is that brass shows fingerprints and water spots more than matte stainless does, so a wipe with a gentle cleaner now and then beats letting it build up.
Mind the undertone, not just the shine
With honey-toned wood shelves and accessories, go for brass that reads warm instead of a brash yellow-gold.
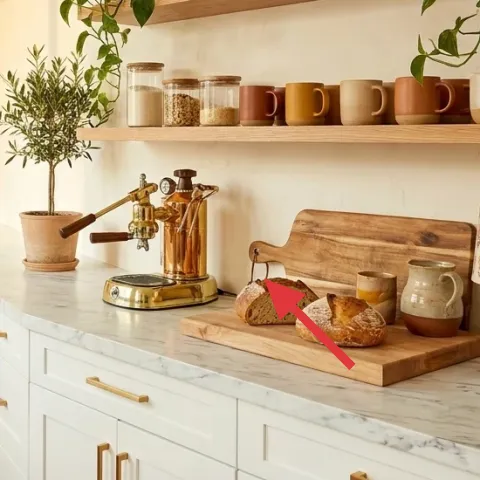
Layer 3 — wood cutting board ($60) keeps the counter looking lived-in

This board is why the counter doesn't feel like a display case. It's big enough to look deliberate, yet it still reads as a working surface with bread and a mug parked beside it. I'll take a real wood board over a decorative tray any day, because it earns its keep in the daily routine and still looks good loaded with groceries or breakfast. The trick is scale: the board covers enough counter to form a grounded rectangle, while the paler marble-look surface keeps the whole thing light. The trade-off is the occasional oiling, but that small habit is exactly what keeps the grain looking rich.
Refresh one instead of buying new
Bring a tired board back with a light sanding and a fresh coat of oil so the grain comes alive, and skip the cost of a brand-new board.
Materials
- Food-safe mineral oil — enough for 1–2 boards — $10
- Fine-grit sandpaper (180–220) — 1 pack — $12
- Microfiber cloths — 2–3 — $8
- Dish soap — 1 bottle — $7
- Paper towels or shop towels — 1 roll — $8
Steps
- Wash the board with warm water and dish soap, then dry fully.
- Sand with fine-grit paper following the wood grain to smooth rough spots.
- Wipe away sanding dust with a dry microfiber cloth.
- Apply a thin layer of mineral oil across the board’s top and edges.
- Let it soak for 15–20 minutes, then wipe off excess oil.
- Let the board dry until it no longer feels oily to the touch.
Total DIY cost: $45 — saves about $15 over buying.
Layer 4 — ceramic jar canisters (on counter) ($65) make storage look intentional
Ceramic canisters on the counter make the corner feel lived-in by design. The jars come across as warm and tactile against the white backsplash and the marble-look surface, and they're clustered tightly enough to read as a set rather than a mess. I'd go for a matching style in one glaze family over a jumble of glass containers, since ceramic carries terracotta and cream tones in a way that softens in daylight. The cost is counter space, so keep the canisters to the staples you genuinely reach for and rotate out anything empty instead of letting it sit.
Hold the group to essentials
A wall of canisters reads busy; trim it down to the ones you actually open every day.
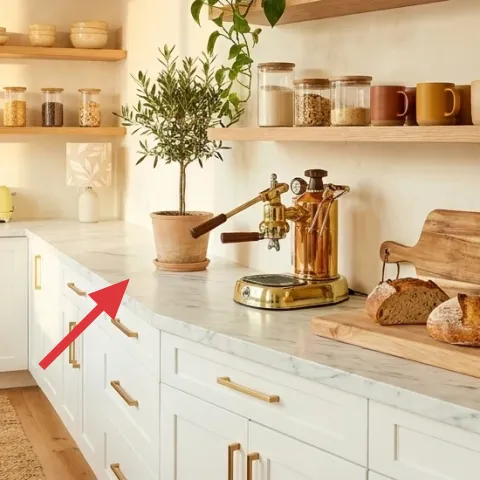
Layer 5 — open wood shelving ($180) gives you intentional vertical storage
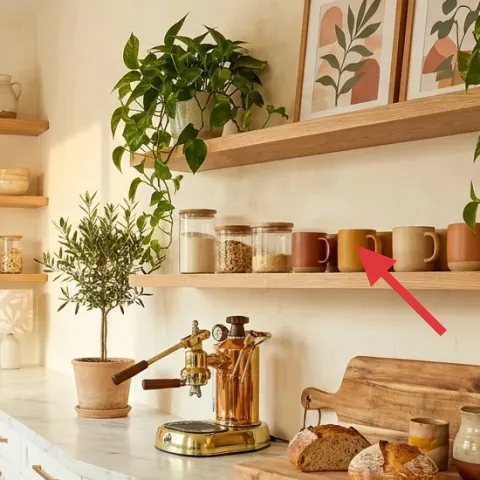
Open wood shelving is the engine of this whole look. It hands you vertical storage without the bulk of upper cabinets, and it lets the warm woods and terracotta ceramics repeat so the kitchen reads styled even on a lazy day. The detail that matters is spacing: the shelves sit high enough to hold mugs and jars comfortably, and the staggered heights keep your eye traveling across the corner. I'd choose open shelves over repainting more cabinets, because it's a bigger payoff for the same weekend. The trade-off is dusting, since nothing's hidden behind a door.
Vary the heights with everyday pieces
Blend tall jars with shorter mugs so the shelf feels balanced rather than rigidly symmetrical.
Layer 6 — patterned dish towel ($25) brings in a little print
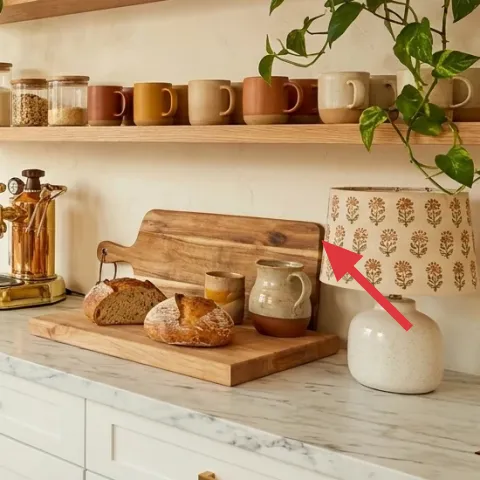
A patterned dish towel is a cheap way to add contrast without lifting a paintbrush. The cream-and-terracotta motif here picks up the warm palette, and folded or draped near the sink it gives the counter a small focal point. I'd match the towel to your tile undertone, warm white in this kitchen, rather than reaching for a bold black graphic, since the room reads airy and bright overall. The downside is that fine-lined prints can fade faster under hard washing, so follow the care label and swap the towel out once it starts looking tired.
Put it where you already work
Drape the towel by the sink so the pattern shows while you're standing there, not only on the walk-by.
Layer 7 — small potted plant ($35) softens the hard edges
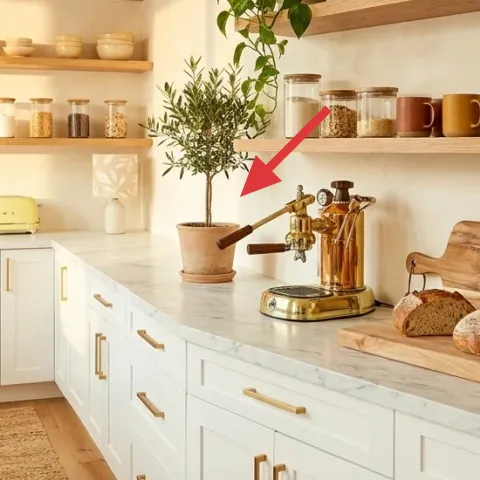
A small potted plant earns its spot by softening the hard surfaces and bridging the shelf styling and the counter below. Tucked between the jars and the faucet, it makes a natural handoff so the corner feels collected instead of merely arranged. I'd pick something with an airy shape rather than a dense round shrub, so it won't block sightlines or crowd the counter. Plants do want light and the occasional wiped leaf, but that beats overhauling the whole shelf the moment it starts to look flat.
Give it a weekly turn
Spin the pot a quarter turn each week so the new growth fills in evenly on all sides.
The cost, layer by layer
| Layer | Item | Cost |
|---|---|---|
| 1 | Jute area rug runner (kitchen size) | $120 |
| 2 | Brass sink faucet | $150 |
| 3 | Wood cutting board | $60 |
| 4 | Ceramic jar canisters (counter set) | $65 |
| 5 | Open wood shelving kit | $180 |
| 6 | Patterned dish towel | $25 |
| 7 | Small potted plant | $35 |
| Total | $635 | |
Want to spend less? Trade the open shelves for a single-lane counter shelf, or just set out fewer canisters. Go with a synthetic look-alike for the natural-fiber runner, and shop a polished brass finish on the faucet instead of paying for solid brass.
What worked, what didn't (across the whole room)
The biggest win is the repetition of warmth: light wood shelving, brass metal, and terracotta ceramics each turn up more than once, which is why the corner hangs together. The runner also makes the work zone feel softer and more deliberate. The one stumble is that plant and towel styling can slide into clutter if you arrange everything with the same fussy precision every single day.
What worked
- The jute runner brings texture underfoot and keeps the bright counter zone feeling grounded.
- The brass faucet repeats the warm metal exactly where your eyes spend the most time.
- The wood cutting board stays practical because it's still doing bread and prep duty.
- The ceramic canisters gather countertop storage into one calm, grouped display.
- The open wood shelving adds vertical storage and a stage for terracotta ceramics to repeat.
- The patterned towel introduces print contrast without touching the cabinet paint or tile.
What didn't
- Too many items left out on the counter read as busy rather than chosen.
- Warm brass shows water spots if you let a few heavy-use days go by without a wipe.
- A plant set too near the hot-water splash zone wears out faster than you'd guess.
- Copying a photo's jar placement to the inch drains the real-life feeling out of it.
- Matching everything by exact color makes the shelf styling feel staged.
What we'd skip if we did it again
Don't fill empty counter just because it's there. This corner works because the essentials, the board, the jars, the towel, carry it, and every extra trinket only pulls focus away from the warm repeats.
Pass on a high-gloss finish for the warm metal. Brass rewards a quick wipe here and there, but a mirror shine means a constant battle with fingerprints; a warmer, less reflective finish is simply less work to live with.
Don't overload the open shelves. They look styled because they're edited, enough jars and mugs to show some personality, but not so many that dusting turns into a monthly project.
Frequently asked
How much of a weekend does this counter-and-shelf reset actually eat up?
Budget somewhere between 2 and 5 hours of hands-on time. The number swings on whether you're mounting fresh shelving or just restyling shelves you already have. Laying the runner and folding the towel take minutes. If you're re-oiling a cutting board, tack on the sanding and oiling, plus a stretch of drying. The rest is just arranging jars and mugs into a grouping that reads on purpose from where you stand.
I rent, so the faucet and shelving are off the table. Now what?
Skip the plumbing and lean on the styling rules instead. Repeat the warm tones, terracotta ceramics and light wood, and build one tight little group on the counter. For storage, a freestanding shelf unit or tension-mounted display does the job where it's allowed. Honestly, the runner and the dish towel deliver the biggest change anyway, and neither one touches a pipe.
My kitchen is small. Can I shrink this down?
Sure, just dial back the volume. Cut the canisters to the staples you grab daily, and keep one plant rather than a pair. A slimmer runner still grounds the work zone. And if shelf space is tight, give your attention to a single shelf line with jars at staggered heights instead of trying to fill every level.
Where should I shop smarter to keep costs down?
Hunt for the runner and the dish towel in natural fibers at home goods stores and fabric outlets. For jars and canisters, kitchen specialty shops and thrift bins are good for finding pieces in the same glaze family. The faucet and shelving are where prices vary the most, so eyeball finishes in a showroom and only buy once the undertone agrees with your wood and terracotta.
What trips most people up with open shelving?
Cramming the shelves wall to wall with nothing left to breathe. Open shelving looks right when there's spacing, some height variation, and a short list of repeating tones. Pare things down until the hero pieces, your jars, mugs, and the one plant, jump out fast. Once it already feels balanced, put down whatever you were about to add.
How do I keep the counter and shelves tidy-looking without fussing constantly?
Set up future-you to win. Wipe the faucet after a messy job, blot the runner rather than scrubbing it, and cluster the canisters so there are only a few surfaces to clean. Dusting open shelves stays manageable when you pick fewer, taller pieces that don't disappear behind clutter. A patterned towel pulls its weight too, hiding the everyday mess a little.
